
If you don’t own any bitcoin but want to “get off zero”, this is the guide for you.
By the end, you’ll have real coins sitting in a wallet you control. By “real”, I mean you’ll be the only person in the world with the keys to those coins - no custodians or paper claims, just money that’s yours.
You can buy as much or as little as you like, and minimal technical expertise is required.
Before anything else: if someone you’ve never met in person has told you to buy bitcoin or cryptocurrency - whether they’re claiming to be an investment manager or a support agent - stop talking to them. It’s a scam. This guide is about buying bitcoin on your own, for yourself.
Before you start
You’ll need three things:
- Some money you’re happy to commit. Don’t be put off by headlines about the price of 1 bitcoin; a single bitcoin is divisible into 100 million units called sats, so you can buy as much or as little as you like. While you’re learning, I’d recommend starting with an amount you’d be comfortable losing.
- A phone or computer. Your wallet will live here, at least to begin with.
- Photo ID, if you go down the centralised exchange route. Regulated exchanges are legally required to verify your identity - more on what that means at the end of this guide.
We’re not covering how to buy bitcoin proxies or ETFs through your investment broker. These products offer none of the properties that make bitcoin worth owning. If you’re not sure of the difference, I cover it in Tier 0 of my custody tiers guide.
Instead, you’ll be taking self-custody of your bitcoin.
First, set up a wallet
A wallet is the app that holds your keys - and in Bitcoin, holding the keys is what it means to own the coins. An account on an exchange (Kraken, Strike, and so on) is not a wallet; it’s an IOU from a company. As such, you should have a wallet of your own before you buy anything.
For your first wallet I recommend BlueWallet, a free and open-source app for iOS and Android.
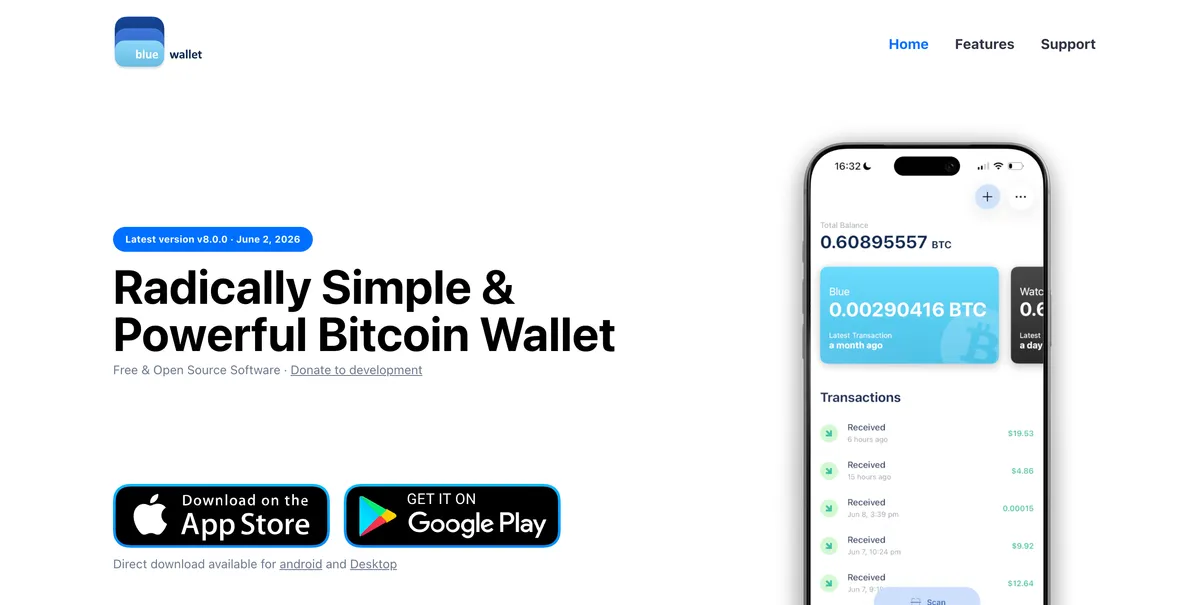
It’s simple, well-maintained, and Bitcoin-only. My full step-by-step guide to setting up your first wallet is coming soon; in the meantime, the short version is all you really need:
- Install BlueWallet from the official website (bluewallet.io) - not from a search result, which is where fake wallet apps lurk.
- Open the app and tap Add now to create a new Bitcoin wallet. The default settings are sensible.
- The app will show you 12 words. Write them down on paper, in order, and store the paper somewhere safe. This is your offline backup.
Those 12 words are your bitcoin. Anyone who reads them can take your coins. If you lose them and your phone, nobody - not BlueWallet, not the company you bought your coins from - can recover your wallet. Never type them into a website, never photograph them, and never share them with anyone, no matter who they claim to be. I’ve written a whole article on seed phrases if you’d like to understand what they actually are.
A software wallet on your phone is what I call Tier 2 in my custody tiers framework: it’s a real step into self-custody and completely appropriate for your first buys. As your stack grows you’ll want to climb further up the ladder, but that’s a later problem.
Option 1: buy from a person
The original way to get bitcoin, and always worth investigating as a first option.
If you have a friend who’s a bitcoiner, this is often as simple as it sounds. Bitcoin is a permissionless and sovereign form of money; if you and a friend want to trade, you can do so directly without any third party getting involved.
Most bitcoiners are delighted to help a friend make their first buy. If someone you trust is willing to sell you bitcoin, you’ll have the dual benefits of (a) getting your coins without surrendering your ID, and (b) an experienced bitcoiner walking you through the process. The steps are simple:
- Agree a price and amount. Look up the current market price on Google. Note it’s normal for sellers to charge a small markup for private sales.
- Give the seller your receiving address. Tap “Receive” in BlueWallet, and give them either the QR code or your address (starting
bc1q). - Pay the seller, via cash or bank transfer as you’ve agreed.
- That’s it. Within seconds of the bitcoin being sent you’ll see the incoming transaction in BlueWallet. Usually within about 10 minutes it’ll be marked as “confirmed”, meaning it’s been mined into a block.
If you don’t know any bitcoiners, here are two good ways to find some:
- A local Bitcoin meetup. Many cities have one, and they’re generally very friendly to newcomers. Someone there will sell you your first sats, or at least point you to whoever will.
- Vexl, a free app that finds people willing to trade bitcoin in your trusted network - your contacts and their contacts. People with whom you have a mutual friend, basically. You browse offers, chat with a seller, and typically meet in person to trade. There are no fees and no middleman. Much like several other privacy-focused apps, it’s installed via Apple’s TestFlight program on iOS.
Whatever you do, remember that bitcoin is digital cash. It’s not so different from swapping cash between two different (fiat) currencies, in that there’s no escrow or support desk. You’re trusting your counterparty, so meet in a public place and start with a small trade.
Option 2: buy on Strike
Centralised exchanges are the route most people take for their first buy. They are a perfectly acceptable way to buy bitcoin, provided (a) you finish the job and withdraw to your own wallet, and (b) you are aware of the trade-offs. More on both these points later.
Most guides suggest you download Coinbase, Kraken, Revolut, or one of the other major “crypto” platforms. There’s nothing inherently wrong with this; as Greg Walker puts it, the most important thing is to find an exchange you trust.
Personally, I don’t like being goaded into buying memecoins and other cryptocurrencies every time I login to the app. I’m there to buy bitcoin; I’m there to save hard money for the long term. I am not there to gamble. Thankfully there are an increasing number of Bitcoin-only exchanges catering to exactly this audience. My favourite of these is Strike, which now operates in over 95 countries worldwide.
Create and verify your account
Head to strike.me and scan the QR code to download the iOS or Android app.
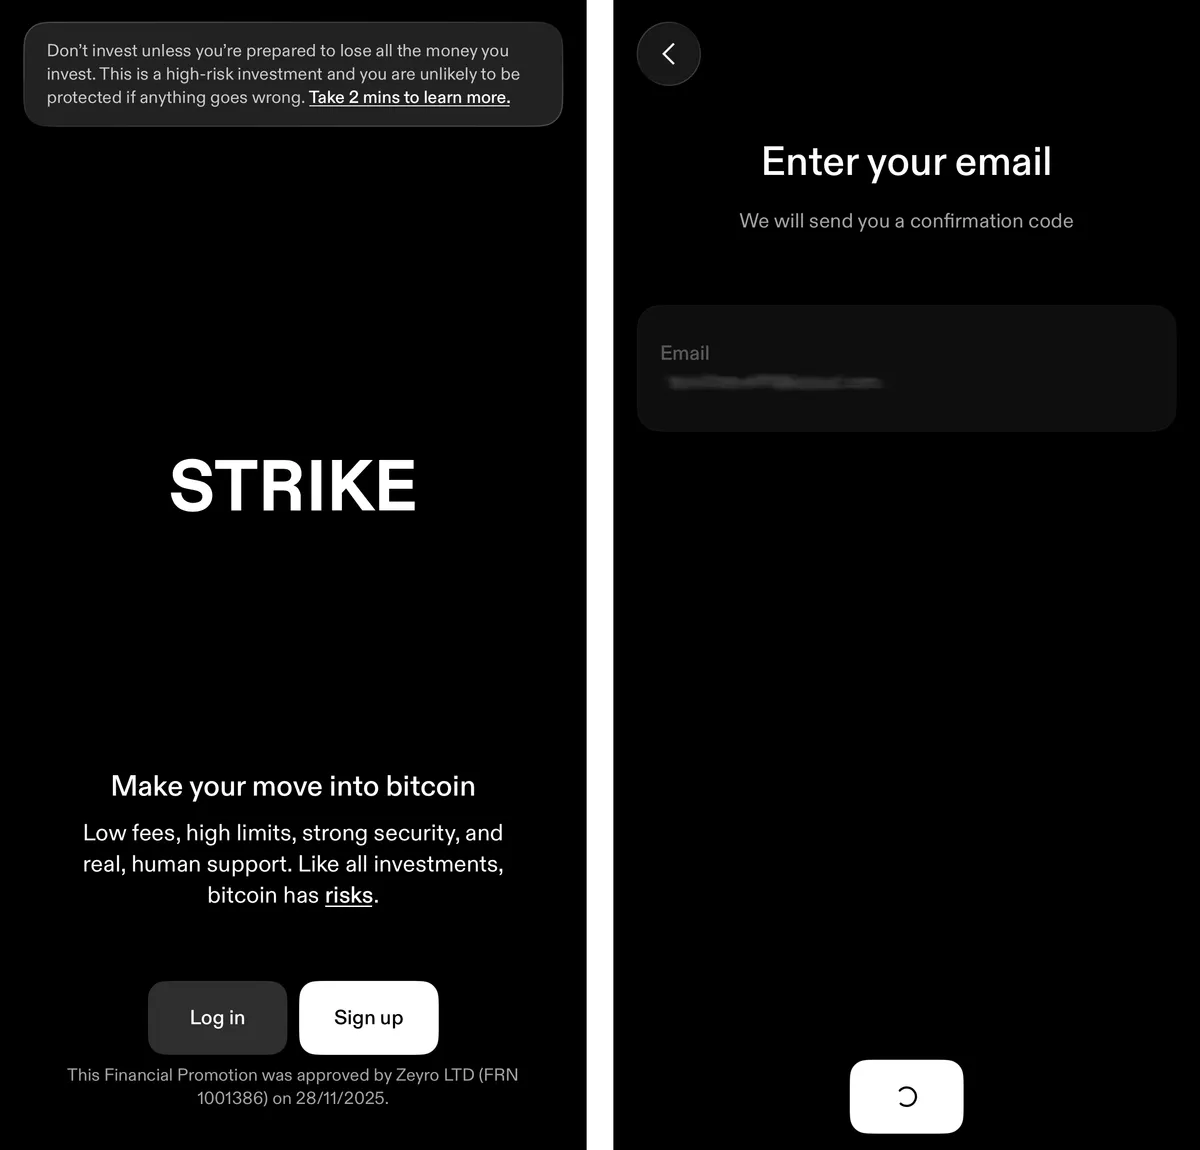
The signup process will vary depending on what country you’re in. If you’re in the UK, remember that our government is yet to make a distinction between Bitcoin - a trillion dollar asset underpinning a global monetary network that’s run uninterrupted for over 17 years - and some crypto meme that launched last week. For this reason, Strike are forced to add the same friction as you’d encounter signing up for Coinbase.
If you’re outside the UK, feel free to skip this part. For my fellow brits, here are a few things which might catch you off-guard:
- Identity verification: You’ll be asked to upload your ID, date-of-birth, and a live selfie in what’s referred to as “know your customer” (KYC).
- Investor profile: You’ll need to confirm that you either earn more than £100,000 per year (a “high net worth” investor) or that you pinkie promise to invest less than 10% of your money into bitcoin (a “restricted investor”).
- Risk agreement: You’ll need to sign a statement acknowledging you might lose all your money (no bailouts for you, no sir).
- Knowledge test: Multiple choice questions which test your understanding of custodial exchanges, cryptocurrencies, and the government’s treatment of both. In general, the answer which sounds scariest is correct. Imagine if this applied equally to fiat banking?
- Cooling-off period: After completing all the steps above, you’ll be asked to wait 24 hours before continuing, just to make really sure you want to buy bitcoin…
Be sure to enable two-factor authentication and a passkey-based login, if you can.
Deposit money, buy bitcoin
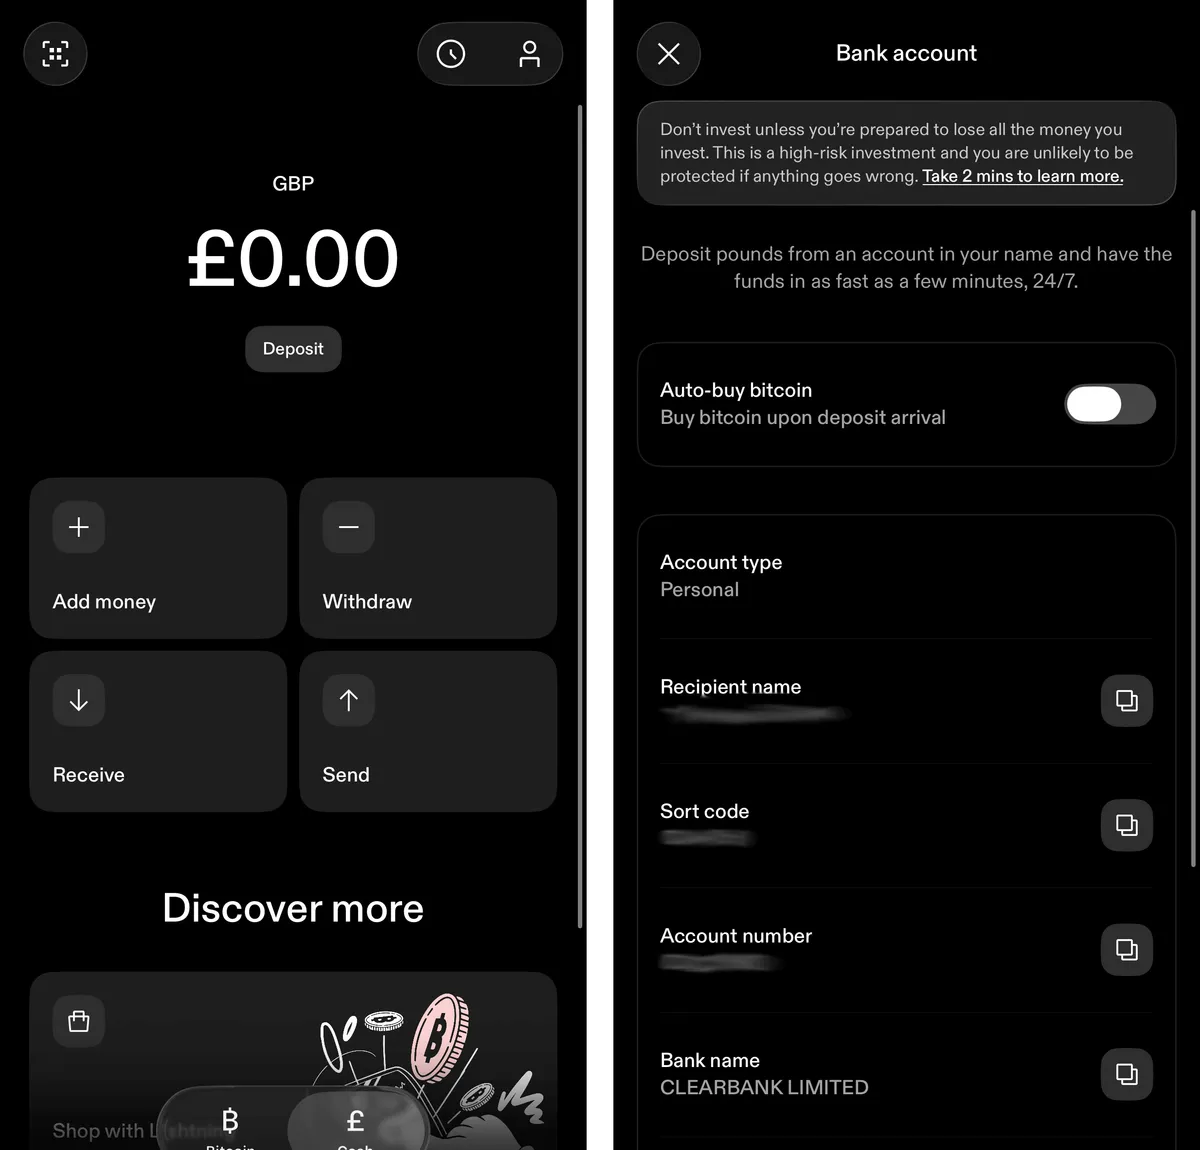
Strike will provide you with a set of bank details, unique to you. You can deposit money into your Strike account by executing a normal bank transfer (Faster Payments in the UK, SEPA in the EU) to this account number and sort code. These transfers usually arrive within seconds or minutes.
Head to the Cash tab and hit “Add money”. Note down your account number and sort code, then set up a transfer from your current account. Don’t enable the “Auto-buy Bitcoin” toggle - I’ll explain why in a moment.
It’s time to complete your first buy. You could hit “Buy” on the Strike homescreen, tap “Max”, and confirm your purchase. Simple as that. But before doing so, I’d like to briefly discuss fees.
Most exchanges charge a percentage-based fee on spot bitcoin buys, and Strike is no exception: you’ll pay 0.89% if you’re just getting started, which is relatively high compared to some other exchanges. While fee optimisation isn’t something you need worry about for your first buy, it’s worth noting that there is a very simple way to pay zero fees on Strike: dollar cost averaging.
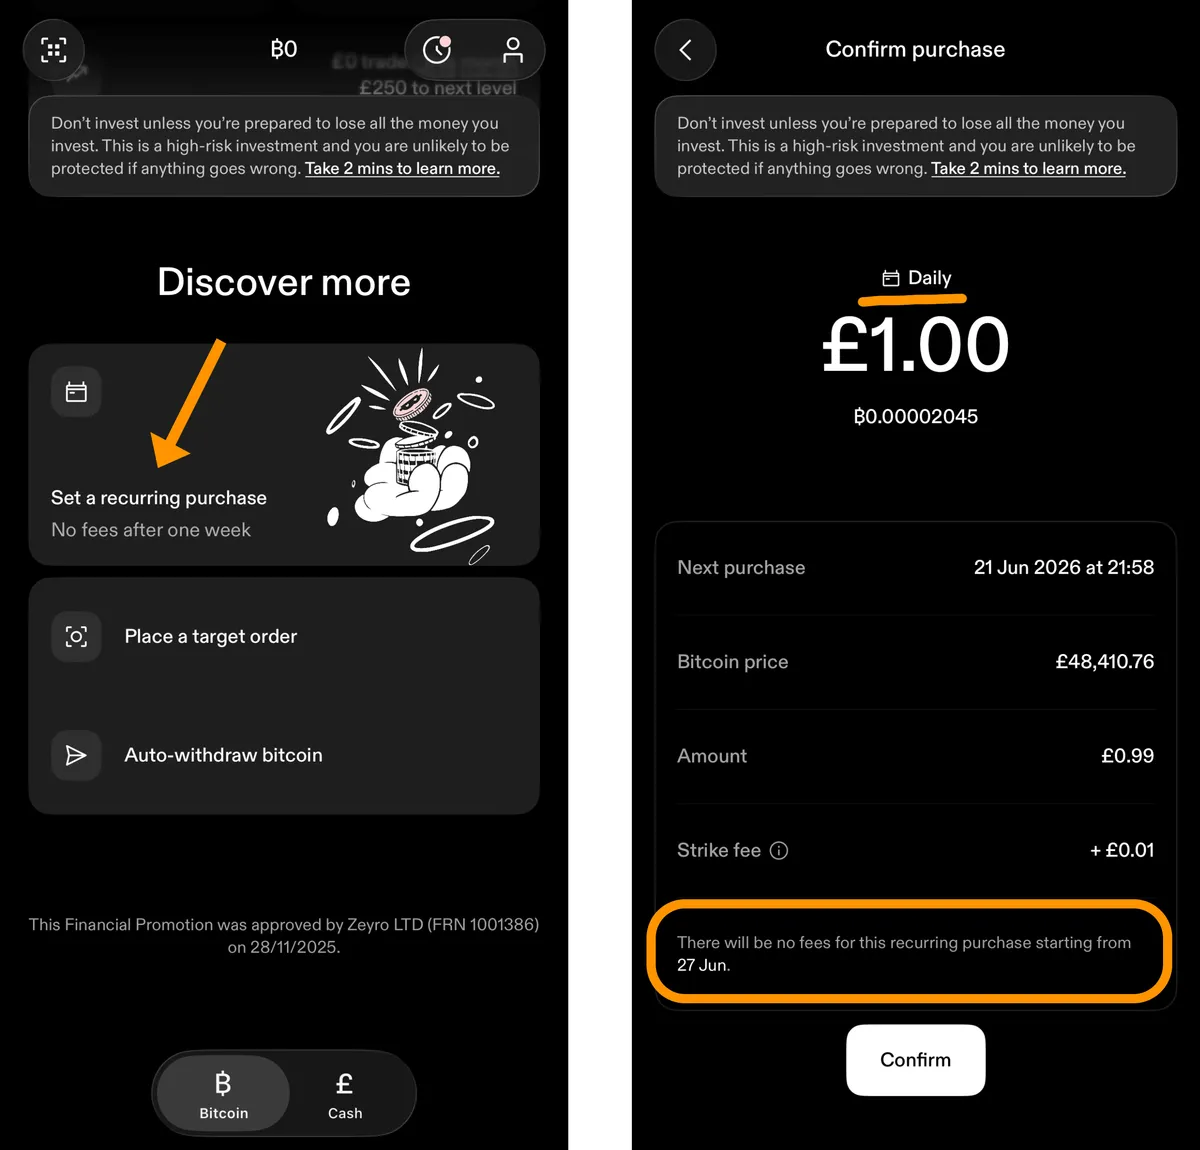
If you setup an hourly or daily Recurring purchase, you will pay zero fees after the first week. If you opt for weekly or monthly, your fees drop to zero after the second purchase. If daily purchasing sounds like a hassle, remember that this is completely hands-off automation. There’s also no minimum - your daily buy amount can be as little as a penny! You can pause and resume your DCA at any time without resetting your fees.
Withdraw to your wallet
This is the step that most beginner guides treat as optional, and it is not optional.
Bitcoin held on a centralised exchange is Tier 1 custody: an entry in the exchange’s database saying they owe you bitcoin. Not your keys, not your coins. You needn’t rush to withdraw every buy the moment it settles, but withdrawing eventually isn’t optional - so make a plan for how and when you’ll do it.
Strike make it very easy to do a one-off withdrawal:
- Open BlueWallet, tap Receive, and copy your address (the long string starting with
bc1q). - In Strike, head to the Bitcoin tab and hit Send → Bitcoin wallet. Paste your address (or scan the BlueWallet QR if you’re on a separate device).
- When asked where the transaction’s going, select Self-custody wallet and Myself.
- Choose delivery time. The free option (Flexible) is only available above a certain threshold.
- Confirm and send. Your bitcoin will arrive in BlueWallet in under an hour, depending on your chosen delivery time.
Verify the address carefully before confirming. Bitcoin transactions cannot be reversed. For larger amounts, send a small test withdrawal first and confirm it arrives before sending the rest.
Once you’ve confirmed everything’s working as expected and you’ve done your first withdrawal, you should be aware there is a cheaper, more hands-off option available: auto-withdrawals. Using this, you’ll benefit from zero fees when moving bitcoin to your wallet. The minimum threshold for automatic withdrawal is 0.001 BTC, which is about £50 as of mid-2026. At that minimum, a £1 daily recurring buy would land in BlueWallet roughly every two months (I’ve set mine higher, to 0.01 BTC, as shown below).
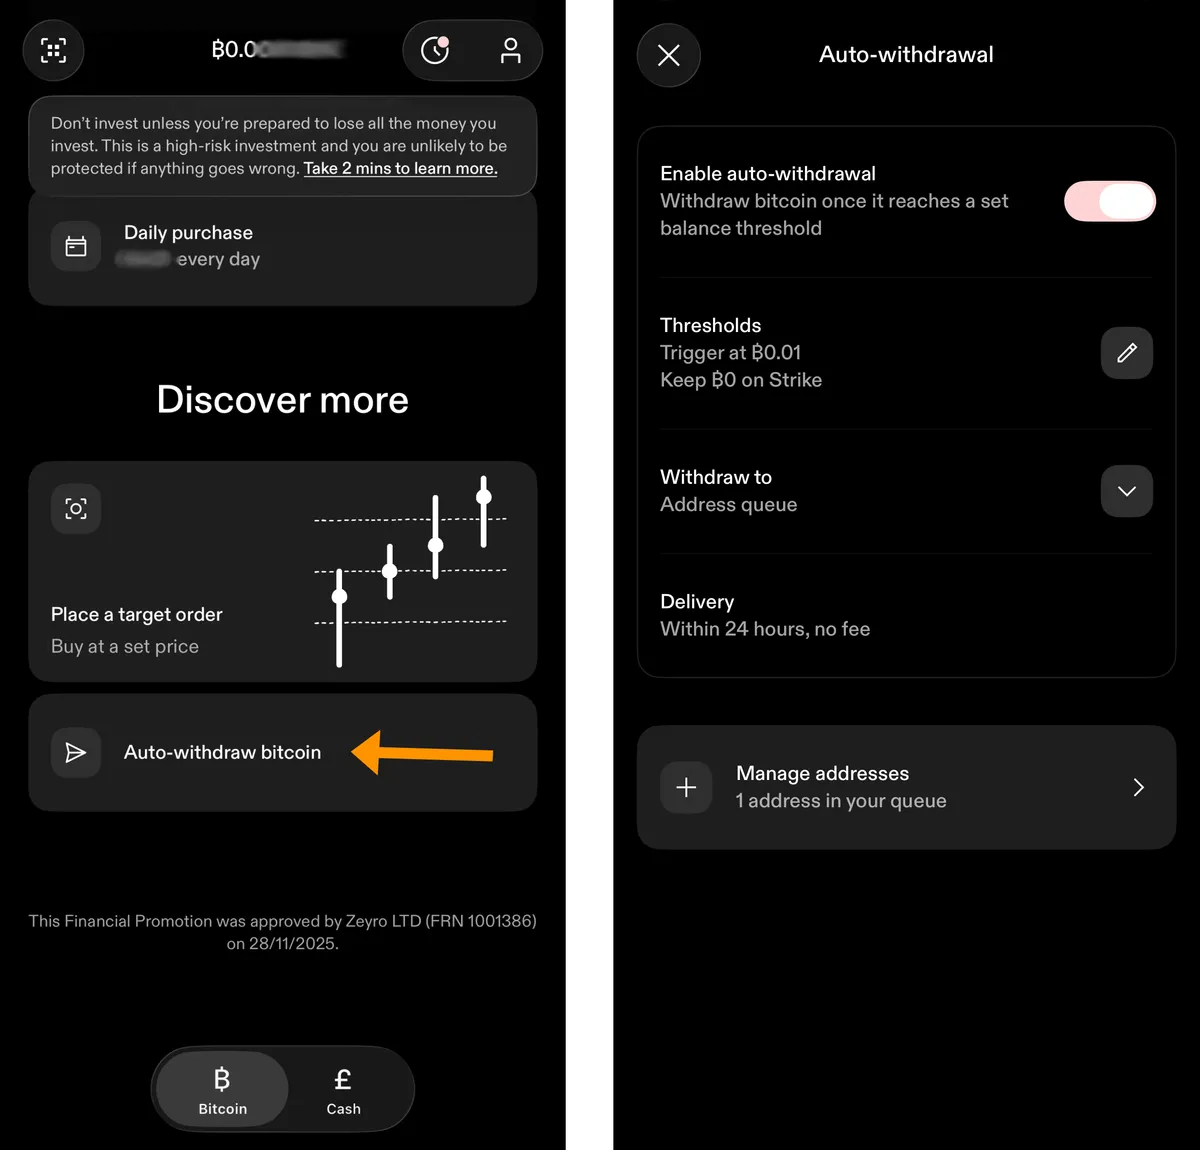
In the screenshot above, you can see I’ve configured Strike to automatically withdraw my bitcoin to my wallet when the balance reaches 0.01 BTC, or 1 million sats (i.e. 1% of a whole bitcoin). Combined with a recurring purchase, this means a fully-automated, end-to-end self-custody saving strategy.
Congratulations, you’re a bitcoiner
However you got here - a friend, Vexl, or Strike - you now own bitcoin in a wallet you control. No bank holds it, no company can freeze it, and nobody’s permission is required to send it anywhere on Earth. That’s not true of any fiat currency you hold.
A few suggestions for where to go from here:
- Make it a habit. I recommended dollar cost averaging for a reason - it removes emotion and temptation, and encourages a long-term mindset. Try out my DCA calculator to learn more.
- Plan your custody upgrade. A phone wallet is the right place to start, not the right place to keep your life savings. When your stack starts feeling significant, the custody tiers guide shows you the ladder: hardware wallets, steel backups, and beyond.
- Protect those 12 words. Re-read the warning in the wallet section. Practically everyone who “loses” bitcoin loses it through a mishandled seed phrase.
A note on KYC and privacy
If you bought on Strike, your purchase is now part of a permanent record: a regulated company knows your identity, your bank details, and exactly how much bitcoin you bought and where you sent it. That data doesn’t always stay put - exchange databases get leaked onto the internet, and in many countries it’s shared with the tax authority by default. If you’re in the UK, I’d encourage you to read up on the new Cryptoasset Reporting Framework.
I want to be measured about this. For most people making their first buys, a KYC exchange is a reasonable trade-off: the liquidity is unbeatable, the fees are low, and if you’re saving for the long term in a wallet you control, the privacy cost is… let’s say manageable.
But you should know that the trade-off exists, because Bitcoin is one of the very few forms of money where you have a choice. You can buy bitcoin the way you bought it from a friend in Option 1 - peer to peer, with nobody keeping a file on you. When you’re ready to understand why that matters and which platforms make it practical, my guide to buying bitcoin without KYC picks up exactly where this one leaves off.
Support the site
Thanks for reading. If you found this guide valuable, you can support my work by sending me bitcoin: