
This is my start-to-finish guide to buying bitcoin on Peach, a mobile-first peer-to-peer marketplace. If you’re new to non-KYC bitcoin and weighing your options, start with my intro to non-KYC bitcoin first. The why lives there, the how - for Peach - lives here.
First I’ll quickly explain why Peach is a great starting point, especially if you don’t yet own any bitcoin, and then we’ll jump into the tutorial.
1. Why Peach?
Peach is the most approachable non-KYC option, and the mobile app is easy to use. It uses the same 2-of-2 multisig escrow model that Bisq does - so trades are protocol-enforced - but with a crucial difference for newcomers: the buyer puts up no security deposit. You can install the app, add a payment method, and buy your first bitcoin in roughly the time it takes to make a cup of tea.
There are two main trade-offs:
- While the liquidity is quite strong (particularly in Europe) the daily buying limit sits at around 1000 CHF (~£950 / ~$1300). This is lower than Bisq’s per-trade limit of 0.0625 BTC (£3500 / $4600 as of May 2026), and is required by the Swiss regulator.
- You’ll pay a non-KYC premium, comprising Peach’s 2% fee plus whatever markup your chosen seller charges. I’ll outline some ways to get a reduced markup later in this guide.
2. Step by step: buying bitcoin on Peach
Install the app
The Peach app is available from the Google Play store on Android, or via Apple’s TestFlight program on iOS. In case you’re wondering, Apple’s regular App Store has strict rules which effectively ban peer-to-peer trading apps - this is why many privacy-focused apps are only discoverable via TestFlight.
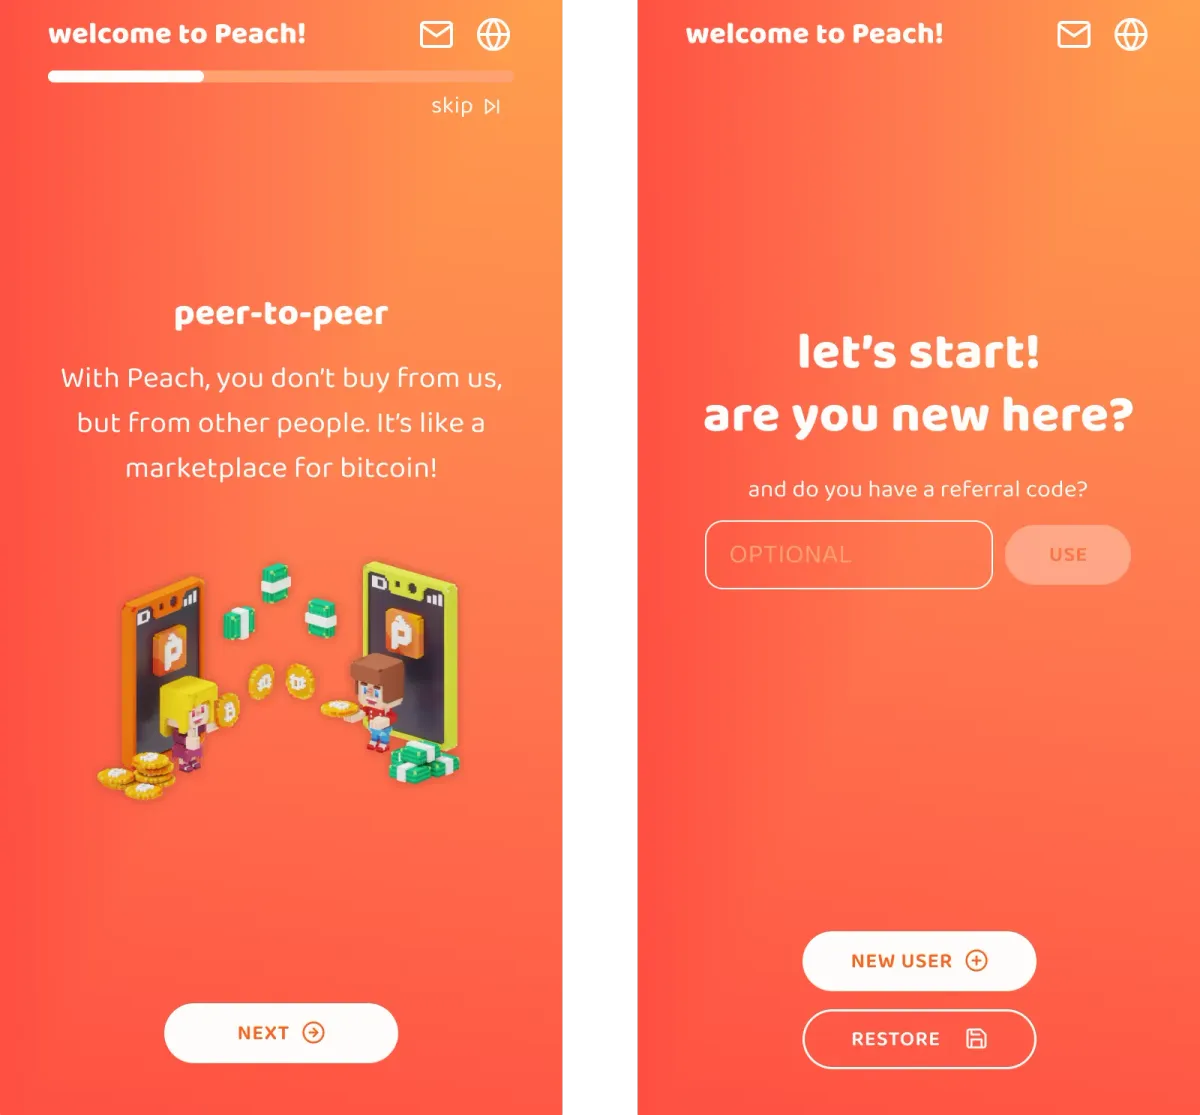
Install the app and run through the welcome screens. Hit “New User” when prompted - there’s no email-based registration and no ID to upload.
Add a payment method
Before taking an offer, you’ll need to add at least one payment account to Peach. This tells your trading partner - and Peach - who to expect a transfer from (or, if you’re selling, who the buyer should pay).
Peach supports a wide range of payment methods. Many offers listed on Peach support multiple methods, meaning the taker of an offer has a choice. In my experience, the most widely supported methods on Peach are Revolut, Wise, and SEPA. If you’re just getting started and want to make your first buy, using your Revolut account is a safe bet.
Open the Settings screen using the cog icon, then under Profile Settings tap Payment methods. Hit Add new currency / payment method, then select your currency. Hit Next, then choose between bank transfer, online wallet, or gift card. SEPA (EU) and Faster Payments (UK) live under bank transfer, while Wise and Revolut live under online wallets.
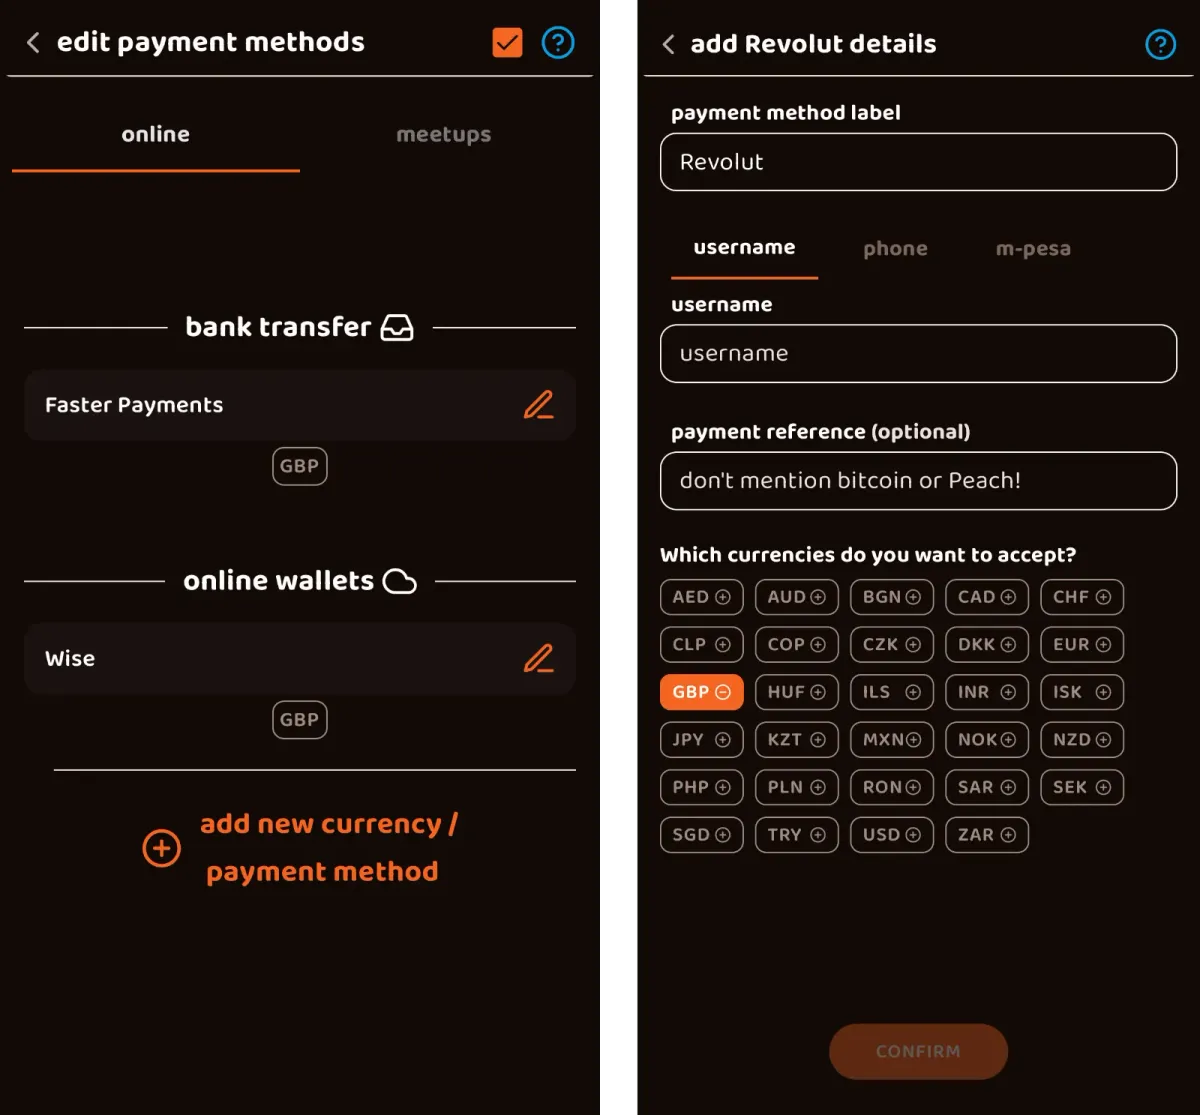
Shown above is the screen for adding a Revolut account. You’ll need to identify your account with a username or phone number, and select your preferred currencies. Be sure to enter your details exactly as they appear on your account to avoid any delays or disputes. I’ll cover the rules around payment references in step 4.
Find and take an offer
Peach has two sides to its marketplace: Buy and Sell. Whether you’re a buyer or a seller, you’ll choose between listing an offer in the respective side of the market (being a “maker”) or accepting an existing offer (being a “taker”). For your first purchase you’ll be taking a sell offer - new users cannot list their own Buy offers until they’ve completed 3 successful trades.
Hit Buy BTC on the homescreen to browse offers. Use the filters at the top to narrow the selection to offers which support your preferred currency and payment method, and which have an acceptable markup.
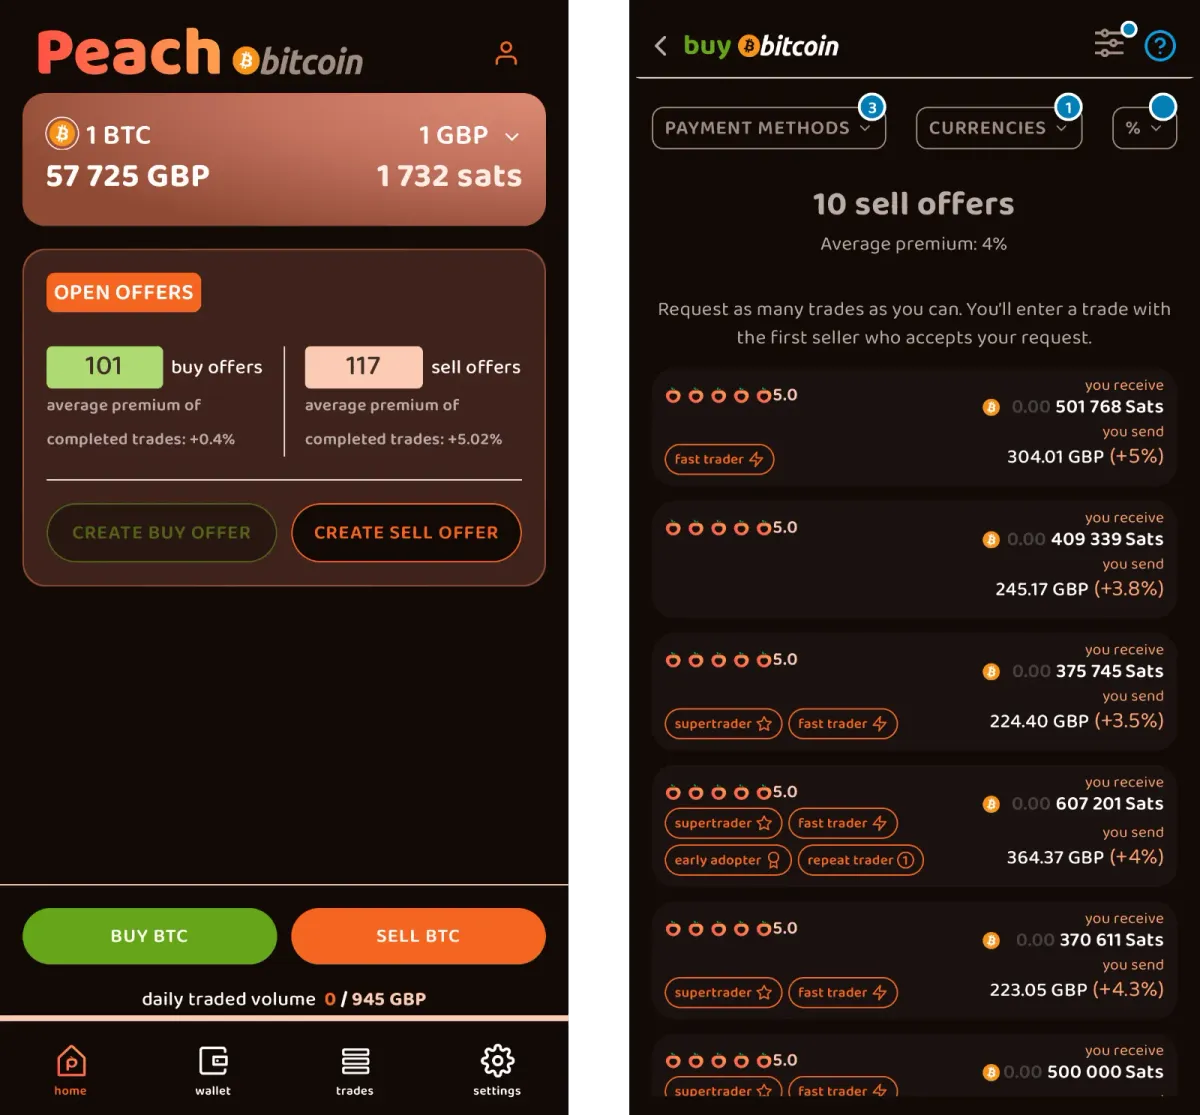
Each offer shows:
- The amount of bitcoin available, shown in sats
- The price in your chosen currency, with the seller’s markup above spot price expressed as a percentage
- The seller’s rating and badges, showing whether they’re an early adopter, frequent trader, and so on
It’s normal to pay a “non-KYC premium”. At the time I took these screenshots it was averaging at about 4%. With a bit of patience you can often find someone trading at or near spot price, and - once you progress onto listing your own offers - you’ll be able to set whatever markup you choose.
Pick an offer that suits you, tap through, and review the details. Hit the seller’s ID to see their public profile.
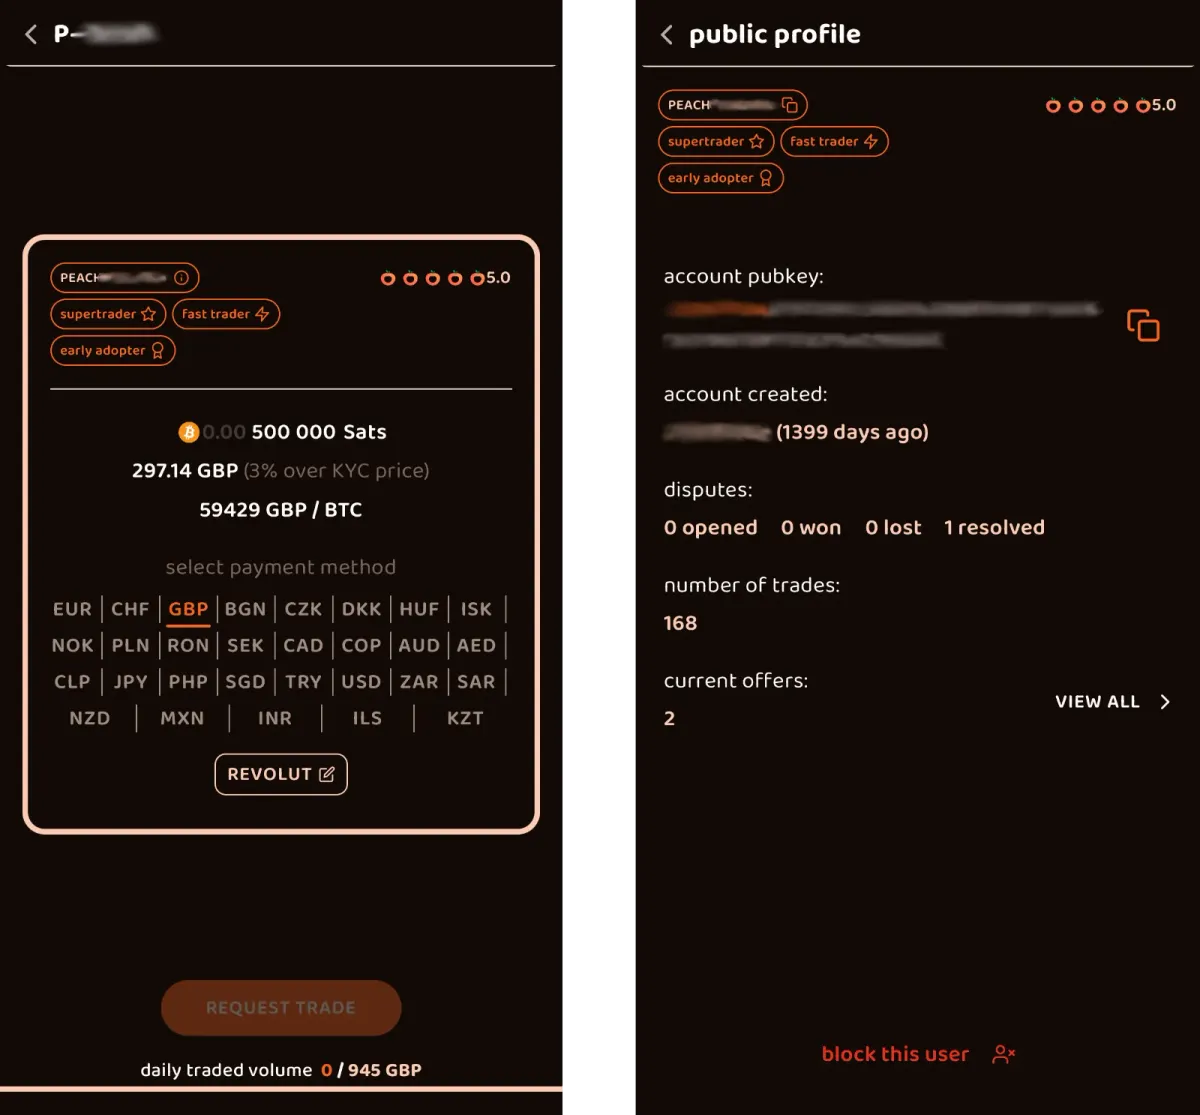
If you like what you see, select your preferred payment method then hit Request trade to get started.
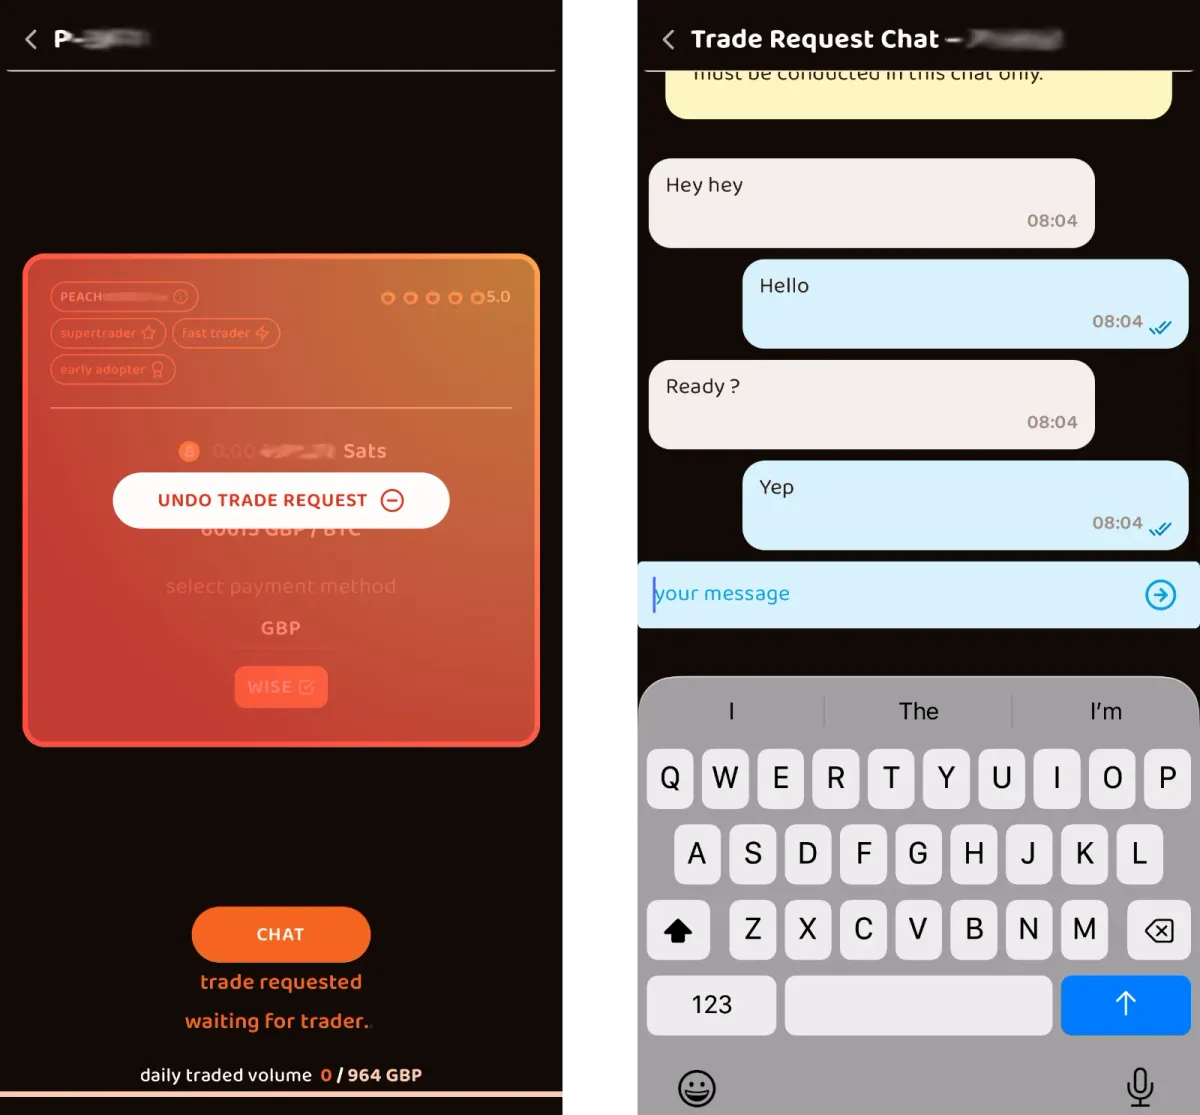
Send your fiat payment
Wait for your seller to accept your trade request. While waiting, you can open an encrypted chat with them. Things typically move quickly on Peach, and your seller might ask if you’re ready to proceed:
Once the seller accepts your trade request, the onus is on them to create the multisig transaction. This is where they lock up the bitcoin into an address partially controlled by Peach.
As soon as the multisig transaction’s been confirmed, you’ll move onto the payment phase. At this point Peach will show you the seller’s account details:
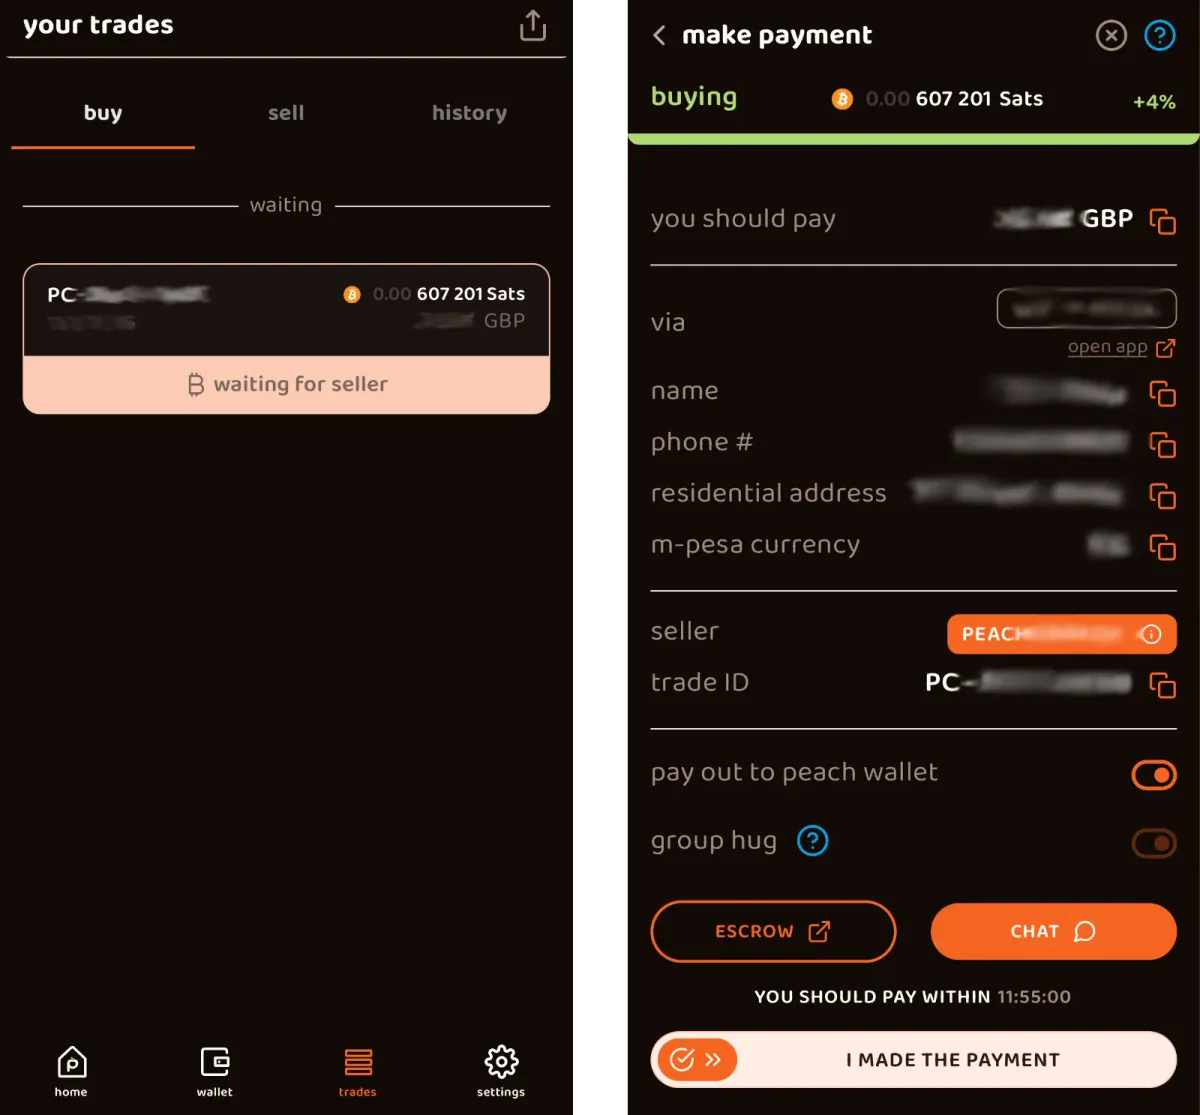
There’s a countdown timer for both sides, shown at the bottom of the screen. In the case of normal trades it’s 12 hours, while an instant trade has a 1-hour limit.
Send the exact amount specified by Peach via your chosen payment method, from the same account you registered in step 2. Do not put anything related to Bitcoin or Peach as the payment reference - if your bank requires a reference, use the seller’s name or agree on a neutral alternative via the in-app chat.
Once you’ve sent the money, you must mark the payment as sent with the Peach app (use the slider shown above). Peach has no integration with your bank and cannot detect the transfer. Forget this step and the trade will stall.
Receive your bitcoin
The seller will check their bank account, confirm they’ve received your payment, and release the multisig escrow on their end. Peach will then broadcast the release transaction and the bitcoin lands in your Peach wallet.
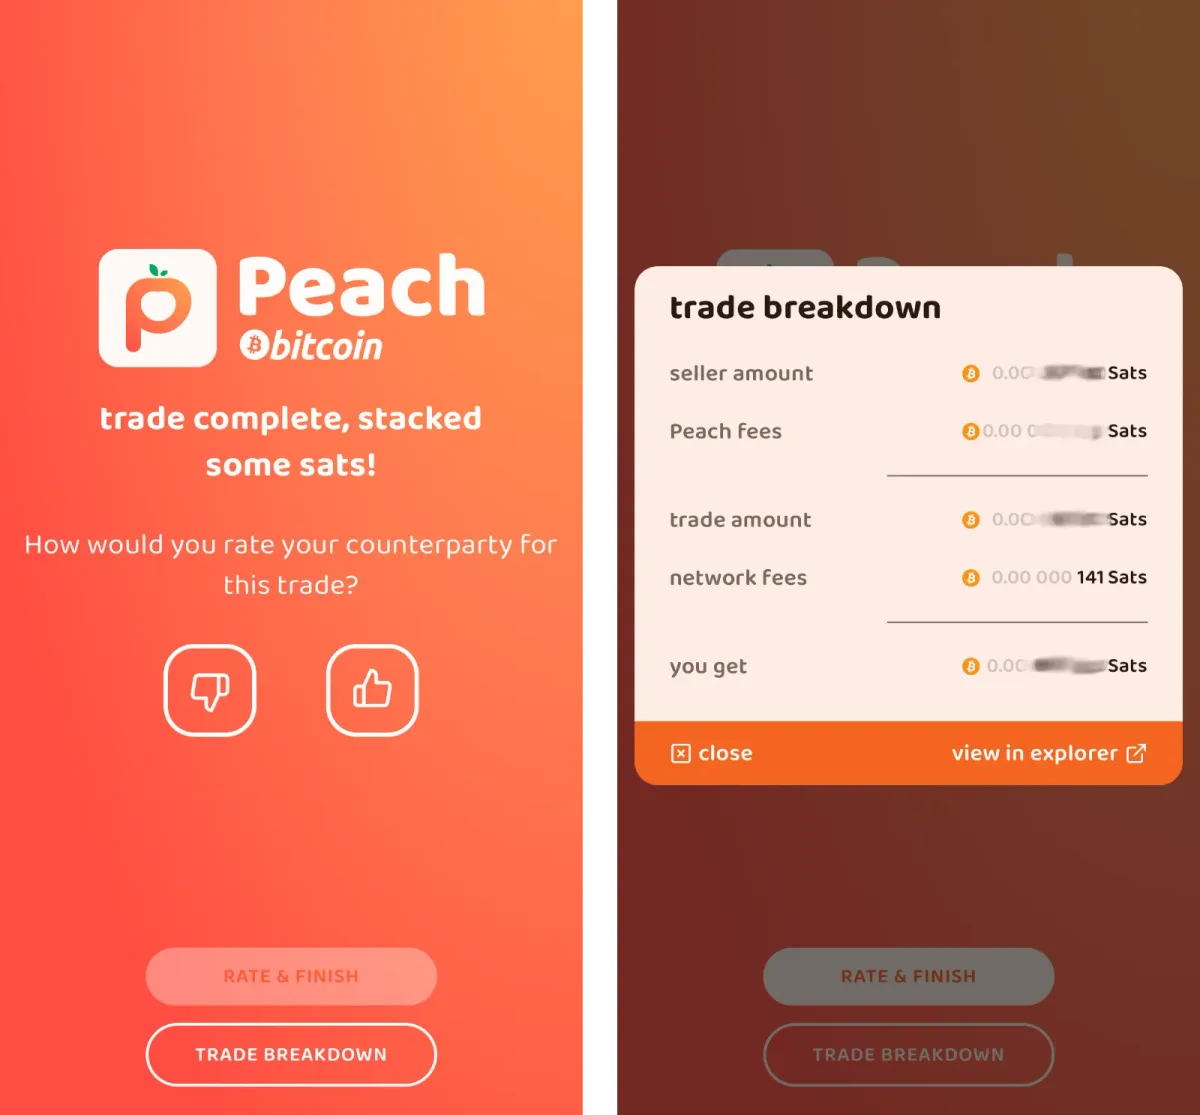
Congratulations on completing your first trade!
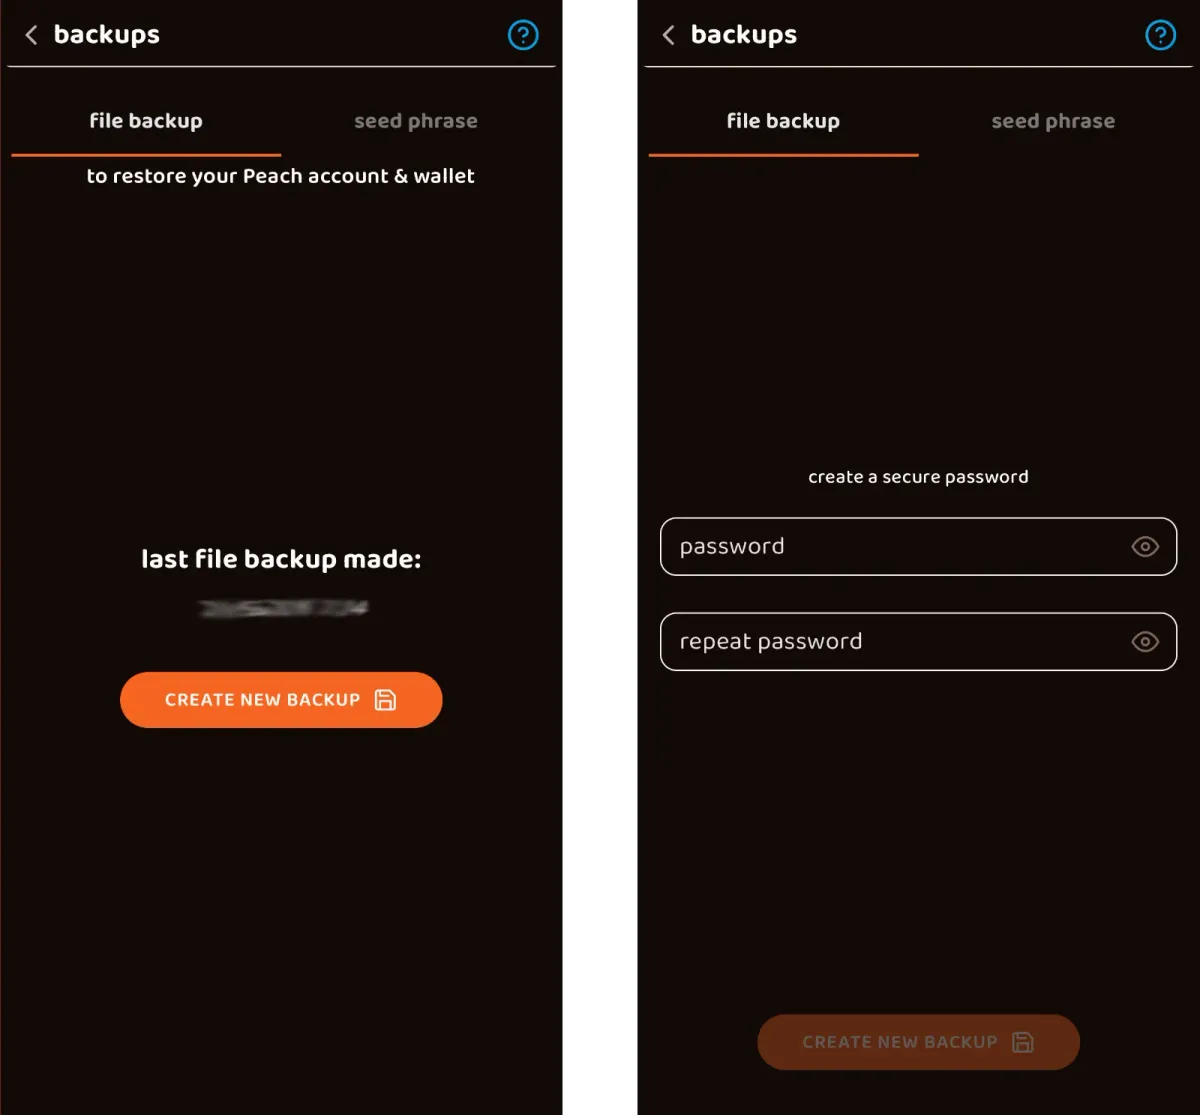
Before you celebrate, though, now is a good time to backup your newly-funded Peach wallet. It’s a non-custodial wallet, meaning you are solely responsible for backing it up - it lives on your device, and Peach support cannot help you recover access.
Open the settings menu, and under Profile Settings tap Backups. Peach will prompt you to set a password to secure your file backup - this file contains everything you need to restore your Peach account and wallet. You’ll also have the option to display the wallet seed words on-screen. Store your backup and password somewhere safe.
Next, it’s time to withdraw your funds to your primary wallet.
Withdraw to cold storage
While your Peach wallet is non-custodial, it’s also a hot wallet that was generated for you by a third party service. It’s good practice to withdraw periodically to a cold wallet that’s fully controlled by you.
Open Wallet from the main nav, check your balance, and hit Send.
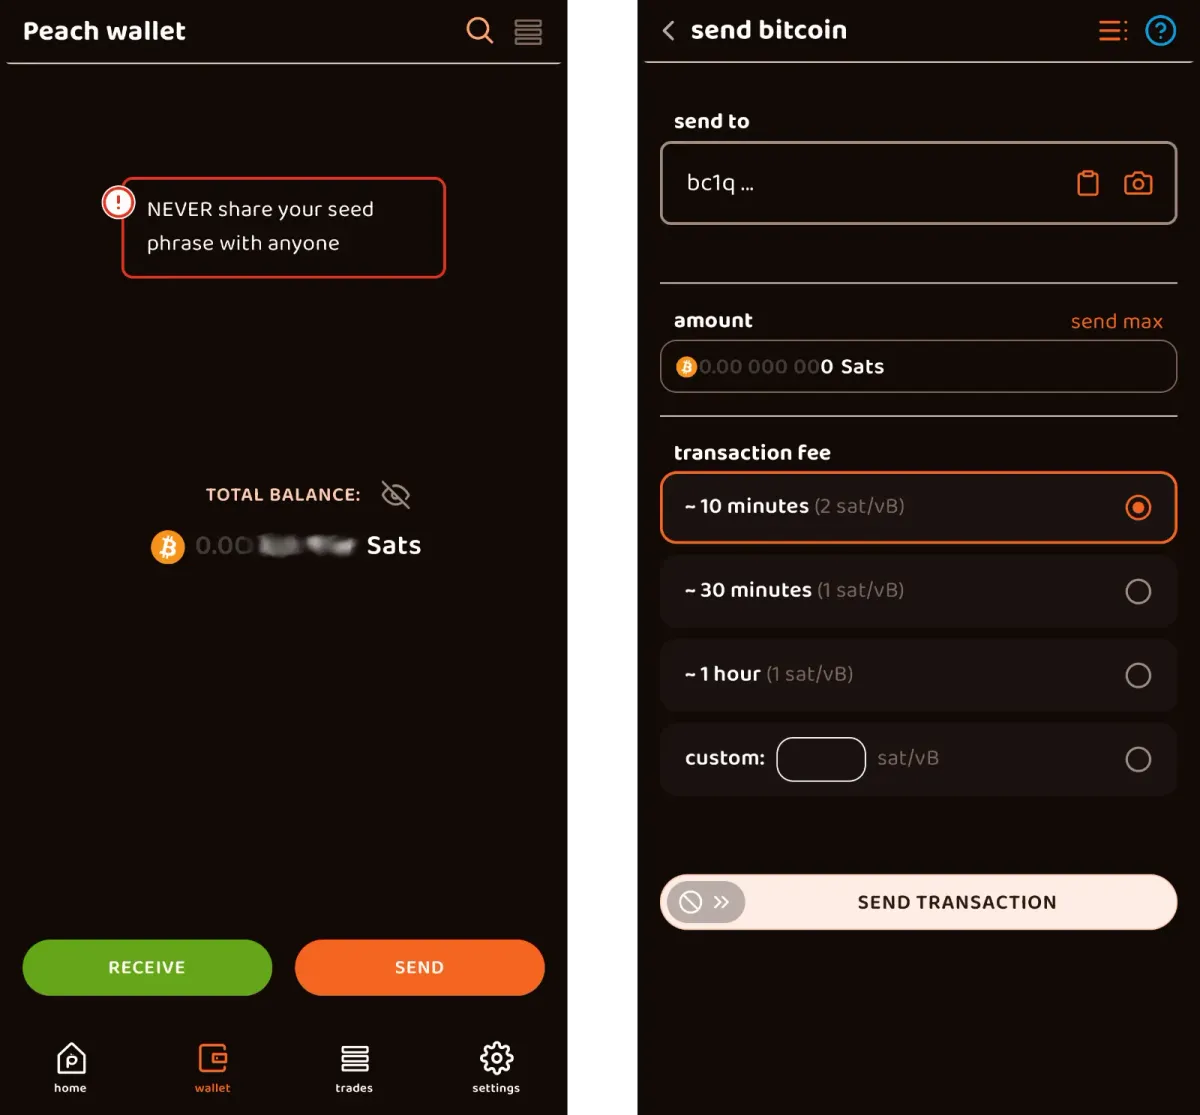
Enter the destination address from your wallet, verifying it carefully as you would normally. Be sure to keep your non-KYC funds entirely separate from wherever you store your KYC bitcoin - mixing the two defeats the purpose. I’d recommend creating a separate account inside your hardware wallet specifically for your “clean” bitcoin.
Hit the “send max” shortcut to withdraw the full balance, set an appropriate transaction fee, and then swipe along the bottom to broadcast the transaction.
And that’s it. You’ve bought bitcoin without surrendering a single piece of identification.
3. Things worth knowing about Peach
- You can leave the app and come back. Unlike Bisq 1, which only shows your offers while the application is open, Peach’s offers persist server-side. You don’t need to keep your phone awake to remain a market maker.
- Spread out your buys. Banks have been known to flag users who send money to lots of new recipients in a short space of time. A nice reminder that the money in a bank account is not really yours. I’d suggest spreading your buys across a few payment accounts (e.g. your regular bank, plus a Wise or Revolut account), and doing fewer, larger trades rather than many small ones.
- Your tax obligations remain the same. You’re still responsible on that front, and it’s beyond the scope of this guide.
- Next time, try making an offer rather than taking one. Once you’ve got a few trades under your belt, listing your own buy offer lets you set your own price - often closer to spot than what’s available on the taker side - at the cost of waiting for a seller to bite. It’s a good way to chip away at your non-KYC premium over time.
4. Welcome to the other side
You’re now equipped to buy bitcoin from your phone, without anyone’s permission, and to do so as often as you like. Withdraw to your own hardware wallet periodically, keep your KYC and non-KYC stacks strictly separated, and you’re in good shape.
For the bigger picture on why this matters - and how Peach compares to Bisq and the other alternatives - see my overview of non-KYC bitcoin options.
Support the site
Thanks for reading. If you found this guide valuable, you can support my work by sending me bitcoin: